
Westminster Wood Flooring handles wood floor refinishing in Westminster, CA, serving surrounding cities including Midway City, Garden Grove, Stanton, Fountain Valley and Huntington Beach. With 20+ years of sanding and finishing behind us, we take worn, scratched, stained and yellowed hardwood back to bare wood and build a new finish on top, or refresh a sound finish with a screen and recoat when that is all the floor needs.
Refinishing is mostly preparation. Before a sander touches the floor, we check how much wood is left above the tongue, read moisture in the boards, pull every carpet staple and tack strip nail, and look for the wax, polish or old repairs that make new finish fail. The coat you see at the end only lasts as long as that groundwork allows.
Every refinish comes with a written, itemized estimate, color samples laid on your own floor and a finish chosen from products legal in the South Coast air basin. You also get a cure schedule that tells you when each room can take socks, shoes, furniture and rugs, so a household living through the job knows exactly where it can walk.
When a Hardwood Floor Needs Refinishing
Gray Traffic Lanes and Worn-Through Finish
A finish wears first where people walk most: the path from the front door, the kitchen work triangle, the hallway to the bedrooms. When those lanes turn dull and then gray, the protective layer is gone and the wood is taking the wear directly. Caught at the dull stage, a screen and recoat can restore it for a fraction of a full sand; once the wood itself is gray, only sanding brings it back.
Oak Under Carpet, Ready to Come Back
Plenty of carpeted homes have hardwood hiding underneath, often in far better shape than the carpet suggests because it has been covered for years. What it does carry is a grid of staples, a line of tack strip holes around the edges and sometimes glued pad. We lift all of it, fill the holes with color-matched filler and sand the oak clean, so the floor comes back looking like it was never covered.
Orange Oak and Yellowed Finish
Red oak finished decades ago with oil-modified polyurethane keeps darkening toward orange as the finish ambers. Sanding removes the old coating along with the top layer of discolored wood, and a clear waterborne finish keeps the new color close to natural. If you want a gray, brown or darker tone, we stain the fresh wood instead, with samples laid out first so the choice is made on your floor.
Our Step-by-Step Wood Floor Refinishing Process
Step 1: Inspect, Measure and Prepare
We check board thickness above the tongue, take moisture readings with a wood moisture meter, and look for loose boards, squeaks and damaged areas that need repair before sanding. Staples, tack strip, nails sitting proud and old repairs are dealt with now. Furniture, floor vents and doors come out, and the work area is sealed off from the rest of the house.
Step 2: Sand to Bare Wood Through a Grit Sequence
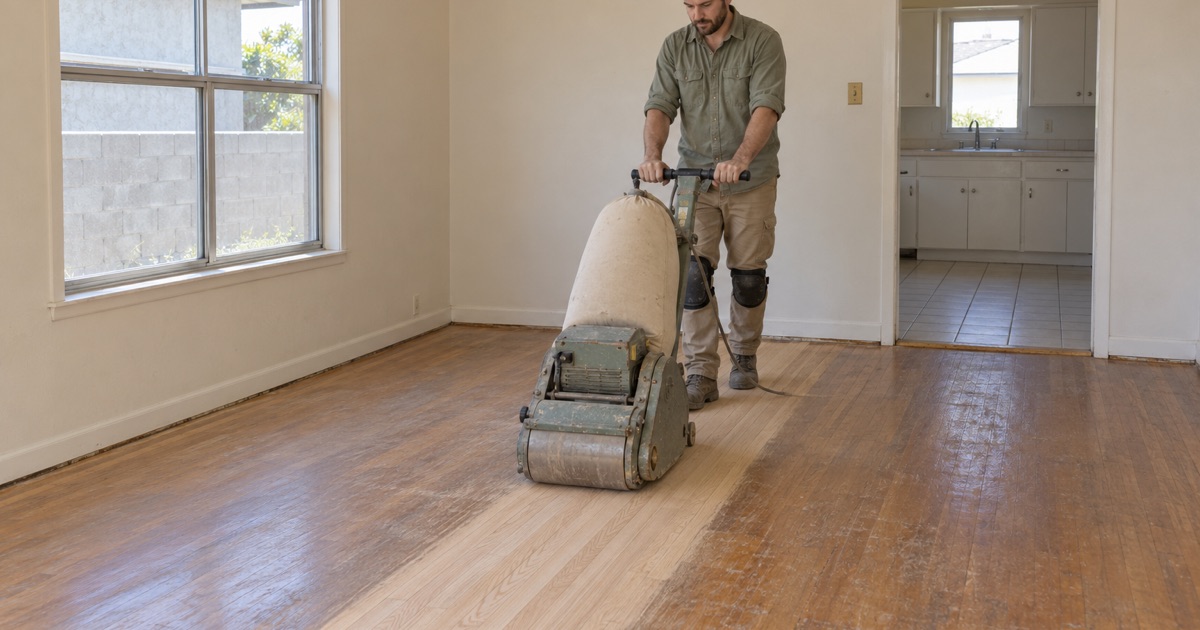
The field of the floor is sanded with a drum or belt sander, starting with a coarse grit only as aggressive as the floor requires, then working up through finer grits to erase the scratches each pass leaves behind. An edger reaches along the walls, and hand scraping cleans the corners and under toe kicks. Rushing the sequence is what leaves visible swirls and chatter marks under the finish.
Step 3: Blend the Edges and Fill
Edges and field are blended with a multi-disc or orbital sander so the perimeter does not show a different scratch pattern from the middle of the room. Gaps, nail holes and small checks are filled, and the floor gets a final fine-grit pass. We vacuum between every grit and tack the surface before any stain or finish touches it.
Step 4: Stain or Seal
If you chose a stain, it goes on by section and is wiped evenly, after the water-pop step where the species calls for it to take color uniformly. Natural floors go straight to a sealer coat. Either way, this first coat sets the color you will live with, so we check it in daylight before moving on.
Step 5: Build the Finish and Hand Over the Schedule
Two or more coats of finish go down with light abrasion between coats for adhesion, following the manufacturer’s recoat window. Once the last coat is down, you get a written cure schedule: when to walk in socks, when to wear shoes, when furniture on felt pads can return, and when rugs are safe.
Stain Colors, Finishes and Sheen
Stain on Oak, Maple and Hickory
Oak has open grain that takes stain evenly, which is why it refinishes so predictably. Maple and birch have tight, uneven grain that blotches under darker stains, so we recommend natural or light tones there, or a conditioner and a test patch first. Hickory’s strong color variation shows through any stain, which suits people who like a rustic floor and surprises people who wanted uniform color.
Waterborne, Oil-Modified and Hardwax Oil Finishes
Waterborne polyurethane is clear, low in odor and quick to recoat, and two-component versions wear very well in busy homes. Oil-modified polyurethane gives an amber glow and a thicker look but darkens with age and needs longer between coats. Hardwax oil soaks into the wood for a natural, matte feel and can be spot-repaired, at the cost of more regular maintenance.
Sheen Level and How Floors Show Wear
Gloss reflects the most light and shows every scratch and speck of dust. Satin and matte hide daily wear far better, which is why most homes land there. We bring sheen samples alongside the stain samples, because the same color reads differently at different sheens once the afternoon light hits it.
Refinishing Around the Rules and the People in the House
Finishes Within the 275 g/L Limit
In the South Coast air basin, SCAQMD Rule 1113 sets the VOC limit for wood coatings at 275 grams per liter. Every stain, sealer and finish we use on a refinish falls within it, and the product names go on your paperwork. Staying within that limit also means lower odor while you are living in the house.
Lead-Safe Work in Pre-1978 Homes
Sanding in a house built before 1978 can disturb lead paint on baseboards, shoe molding and door casings. We follow the EPA Renovation, Repair and Painting rule work practices around those surfaces, with containment and cleanup that keeps lead dust out of the living space. That matters most in homes with young children or someone pregnant.
Refinishing Rentals Between Tenants
A vacant unit is the easiest floor to refinish, and a short window between tenants is often all a landlord gets. We schedule the sanding, finish coats and cure so the floor is ready for move-in, and the itemized invoice records the work for your files. Where only some rooms are worn, a screen and recoat can stretch the budget further.
- 20+ Years of Floor Work
- Written, Itemized Estimates
- Moisture Readings Recorded